The surface prep step that paint needs most is cleaning and sanding to create a smooth, dust-free base. You want to remove grease, loose paint, and debris so the primer and paint can adhere properly. Proper cleaning guarantees better adhesion, reduces the need for extra coats, and extends the paint’s lifespan. If you stick to these prep steps, your finish will look professional and last longer. Keep going to discover the key details to get it just right.
Get ready for Prime Big Deal Days — try Prime free
Exclusive member deals on October 6–7, plus fast free delivery. Cancel anytime.
As an affiliate, we earn on qualifying purchases.
Key Takeaways
- Proper cleaning ensures the surface is free of dust, grease, and debris for better paint adhesion.
- Surface preparation, including cleaning and sanding, prevents issues like peeling and blistering.
- Applying a suitable primer enhances adhesion and blocks stains or discoloration.
- Selecting the right brush and applying prep materials evenly improves finish quality.
- Adequate surface prep extends the lifespan and durability of the paint job.

Are you ready to guarantee your paint job lasts? The most crucial step often overlooked is proper surface preparation, and that starts long before you pick up a brush. When it comes to ensuring a smooth, durable finish, understanding the importance of brush selection and primer application can make all the difference. These steps aren’t just preliminary chores; they lay the foundation for a professional-looking result that endures.
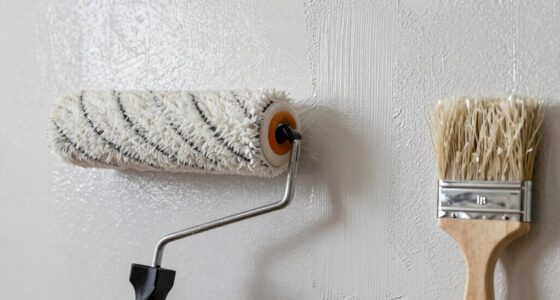
First, think about your brush selection. Picking the right brush is essential because it impacts how well the paint adheres and how smooth your finish looks. For most surfaces, a high-quality, synthetic-bristle brush works best—especially for latex paints—because it provides better control and minimizes brush marks. If you’re working with oil-based paints, a natural-bristle brush can give you a smoother application. No matter what, avoid cheap, loose-bristled brushes that shed fibers and create an uneven surface. When you choose your brush wisely, you reduce the need for extra coats and touch-ups later, saving you time and effort down the line.
Choosing the right brush ensures a smooth finish and reduces the need for extra coats.
Next, focus on primer application. This step is often underestimated, but skipping or improperly applying primer can cause paint to peel, blister, or fail to stick altogether. Before you start painting, make sure your surface is clean, dry, and free of dust, grease, or loose paint. Applying a good primer creates a uniform base that enhances paint adhesion and helps prevent stains or discoloration from bleeding through. Use a roller for large, flat areas and a brush for edges and corners, ensuring you apply a thin, even coat. Don’t rush this step; allow the primer to dry thoroughly according to the manufacturer’s instructions. Proper primer application not only improves paint coverage but also extends the lifespan of your paint job by providing a solid foundation. Additionally, understanding surface preparation as a key factor in paint durability can help you recognize its importance beyond just cleaning and sanding. Proper surface preparation also involves understanding the material composition of the surface, which influences the type of primer and paint you should use for optimal adhesion and longevity. Taking the time to properly prepare your surface ensures the paint adheres better and lasts longer, saving you time and money in the long run.
In essence, surface prep involves more than just cleaning and sanding. It’s about making deliberate choices—selecting the right brush and applying primer correctly—that will determine how well your paint adheres and how long it lasts. If you prioritize these steps, your finished project will look better, last longer, and require fewer touch-ups. Remember, investing a little extra time upfront in proper surface preparation pays off with a flawless, durable finish that stands the test of time.
high quality paint brushes for walls
As an affiliate, we earn on qualifying purchases.
As an affiliate, we earn on qualifying purchases.
Frequently Asked Questions
How Do I Identify the Best Surface Prep Method for Different Materials?
To identify the best surface prep method, first consider surface compatibility and material-specific techniques. You need to evaluate the material’s texture, porosity, and previous coatings. For smooth surfaces like metal, sanding and priming work well, while rough or porous materials like wood require cleaning, sanding, or stripping. Always research the specific material to choose the appropriate prep steps, ensuring the paint adheres properly and lasts longer.
What Tools Are Essential for Effective Surface Preparation?
You need essential tools like wire brushes, sanding blocks, and degreasers to tackle surface contaminants effectively. These tools make sure you remove dirt, grease, or rust, making your surface primed for paint. A good quality primer is vital for adhesion, especially on challenging surfaces. With the right scraper, sandpaper, and cleaning solutions, you’ll achieve a smooth, clean base that guarantees your paint job lasts and looks flawless.
How Long Should I Wait After Surface Prep Before Painting?
You should wait at least 24 hours after surface prep before painting, ensuring the surface is completely dry and free of surface contamination. Moisture barriers help prevent moisture buildup, so check for any signs of dampness or trapped moisture. If conditions are humid or the surface feels damp, wait longer until it’s thoroughly dry. Proper curing time guarantees better adhesion and a longer-lasting paint job.
Can Surface Preparation Be Skipped or Minimized?
Skipping or minimizing surface preparation is risky—you might think it saves time, but it often leads to poor paint adhesion and peeling later. Proper priming techniques and thorough surface cleaning are essential for a flawless finish. You can’t just skip these steps without consequences. Trust in the prep process, because neglecting it can ruin your project, forcing you to redo everything. Better to prepare right the first time.
How Do I Fix Surface Imperfections Before Painting?
To fix surface imperfections before painting, start by cleaning the area thoroughly for painting safety and eco-friendly prep. Sand down rough spots, fill dents or holes with a suitable filler, and smooth the surface. Wipe away dust with a damp cloth. Proper prep guarantees your paint adheres well and lasts longer, reducing the need for touch-ups. Using eco-friendly products during this step supports both safety and environmental sustainability.
As an affiliate, we earn on qualifying purchases.
Conclusion
Remember, proper surface prep is the foundation of a great paint job, much like a solid bedrock supports a tall building. If you take the time to clean, sand, and prime your surface, your paint will adhere better and last longer. Skipping this step is like trying to build a house on quicksand — it’s doomed to fail. So, invest a little extra effort now, and your finished project will look flawless and stand the test of time.
As an affiliate, we earn on qualifying purchases.
dust and grease remover for painting
As an affiliate, we earn on qualifying purchases.
As an affiliate, we earn on qualifying purchases.
Fall yard work Picks
leaf blowers
As an affiliate, we earn on qualifying purchases.