To make installations look cleaner, focus on organizing cables along designated paths using cable ties, Velcro strips, or cable management channels. Combine this with placing wireless devices strategically to minimize exposed wires. Balancing cable routing with wireless setup creates a sleek, clutter-free environment that appears professional and modern. Planning your layout carefully guarantees a tidy, easy-to-maintain space. Keep exploring to discover more effective tips for achieving a clean and organized setup.
Key Takeaways
- Use a centralized layout to group devices and cables, reducing clutter and simplifying cable management.
- Incorporate wireless connectivity whenever possible to eliminate unnecessary cables and streamline the setup.
- Plan cable routes along designated paths, hiding cables behind walls or furniture for a cleaner appearance.
- Label and organize cables with ties or Velcro strips to maintain order and facilitate troubleshooting.
- Balance wireless solutions with strategic cable management to achieve an organized, professional, and modern installation.
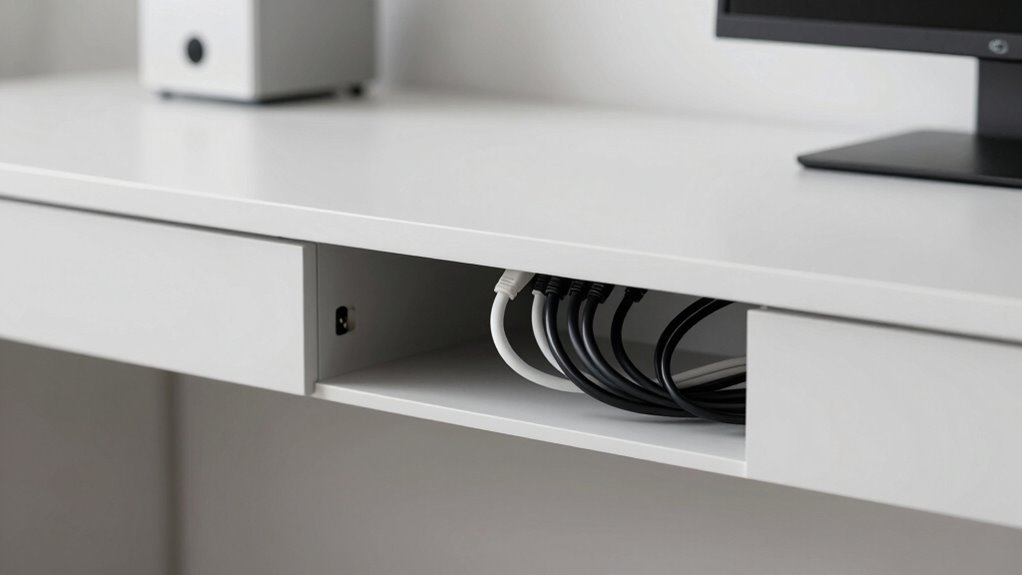
When you focus on integrating wireless connectivity seamlessly into your setup, it minimizes the need for excess cables, which can clutter your workspace and create a chaotic appearance. This approach emphasizes a clean, streamlined look that impresses clients and boosts your efficiency. Proper cable management isn’t just about aesthetics; it also improves safety, reduces the risk of damage, and makes future updates easier. When you hide cables and run them along designated paths, you create a visually tidy environment that looks professional and intentional. Incorporate wireless connectivity wherever possible to eliminate unnecessary wiring altogether. For instance, using Wi-Fi-enabled devices reduces the need for long Ethernet runs, freeing your space from clutter and creating a sleek, modern appearance.
Another aspect of this layout trick involves prioritizing wireless connections for devices that don’t require a wired connection. Laptops, printers, and smart home gadgets often work just as well on Wi-Fi. By doing this, you reduce the number of cables running across your installation, giving the entire setup a cleaner look. When you combine this with thoughtful cable management for the remaining wired devices, your installation looks cohesive and well-organized. Keep in mind that labeling cables and using cable ties or Velcro strips helps you maintain this order over time, making troubleshooting and upgrades less of a hassle. Additionally, understanding the importance of biodiversity and sustainable practices can inspire eco-friendly choices in your setup, such as opting for energy-efficient devices and reducing electronic waste. This also encourages the use of energy-efficient devices that can lower your overall environmental impact. Incorporating eco-friendly solutions can further enhance the sustainability of your setup.
Ultimately, the secret to a neat, professional installation lies in balancing wireless connectivity and effective cable management. When you plan your layout carefully and prioritize wireless solutions where possible, you cut down on clutter and create a space that’s both functional and visually appealing. Incorporating cable management techniques can further streamline your setup and prevent future messes. This simple yet powerful trick ensures your installations look clean, stay organized, and impress anyone who walks into the room. The result is a seamless blend of technology and design that stands out for its clarity and precision.

SOULWIT 50Pcs Self Adhesive Cable Management Clips – Black
- Easy to Use: Stick, open tab, insert cables, close
- Premium Material: Eco-friendly Polyamide66, anti-static, strong
- Universal Adhesion: Works on desks, walls, wood, metal, ceramics
As an affiliate, we earn on qualifying purchases.
As an affiliate, we earn on qualifying purchases.
Frequently Asked Questions
Can This Layout Trick Work With Any Type of Installation?
Yes, this layout trick can work with any type of installation, enhancing its aesthetic and creating visual harmony. By applying this trick, you draw attention to key elements while maintaining a clean, organized appearance. Whether it’s a small setup or a large display, the trick helps streamline the design, reducing clutter and making your installation more appealing. It’s versatile and adaptable, ensuring every project looks professional and well-balanced.
Does Implementing This Trick Require Special Tools or Materials?
You don’t need any special tools or unique materials to implement this layout trick. It mainly involves careful planning and simple adjustments to your existing setup. Basic tools like a level, tape measure, or screwdriver are sufficient. You won’t have to invest in pricey or specialized equipment. Just focus on aligning everything properly, and you’ll achieve a cleaner, more professional look without the hassle of sourcing anything unusual.
How Long Does It Typically Take to Apply This Layout Method?
Applying this layout method is like painting a masterpiece—once you get into the rhythm, it takes about a few hours to a day, depending on your space. You’ll find it enhances aesthetic consistency and space optimization, transforming clutter into clarity. With focused effort, you can achieve a sleek, unified look that feels both intentional and refined, making your installation truly stand out with minimal fuss.
Will This Trick Affect the Accessibility of the Installation?
No, this trick won’t negatively impact visual accessibility or ergonomic design. In fact, it enhances both by organizing elements more clearly and reducing clutter. You’ll find it easier for users to navigate and interact comfortably. By focusing on clean lines and logical placement, this layout promotes better visual accessibility and ergonomic efficiency, making your installation more user-friendly without sacrificing aesthetic appeal.
Are There Any Common Mistakes to Avoid When Using This Layout?
Yes, avoid cluttering your layout with too many decorative accents, which can distract from the clean look. Be careful with color coordination; mismatched or overly bold colors can disrupt the design’s harmony. Keep decorative elements simple and consistent, and use complementary colors to enhance visual flow. These mistakes can make your installation appear chaotic, undermining the clean aesthetic you’re aiming for. Focus on balance to achieve a polished, cohesive look.

Wireless HDMI Transmitter and Receiver 400FT/120M Extender, Plug&Play 5.8G+2.4G for 4K Decode 1080P Video Output with LED Display, for Audio to Monitor from PC/Projector/TV Box (Blue)
- Plug and Play Setup: Easy wireless connection in seconds
- Long Range Transmission: Up to 400ft (120m) coverage
- Dual-Band Stability: Supports 5.8G and 2.4G frequencies
As an affiliate, we earn on qualifying purchases.
As an affiliate, we earn on qualifying purchases.
Conclusion
By adopting this simple layout trick, you’ll transform any installation into a sleek, professional-looking setup — no fancy tools required. Think of it as the secret handshake of tidy spaces, much like a well-placed quill in a pirate’s treasure chest. Stick to this method, and you’ll impress even the most discerning eye, proving that sometimes, the smallest change can make the biggest difference. So go ahead, channel your inner Marie Kondo, and let your install speak for itself!

VELCRO Brand Reusable Cable Ties, Cord Management, 6in, Black, 100 Pack
- Instant Cable Organization: Pre-cut ties for easy management
- Ideal Gift for Organizers: Practical gift for men on special occasions
- Reusable and Adjustable: Easily reused and adjusted for multiple uses
As an affiliate, we earn on qualifying purchases.
As an affiliate, we earn on qualifying purchases.

YECAYE Cable Management, 6 Pack, Black
- Spacious Cable Organizer Set: Includes 6 J channels for desks
- Ideal for Office and Home: Organizes cords on desks and tables
- Effortless Cable Insertion: Outward-facing opening for easy access
As an affiliate, we earn on qualifying purchases.
As an affiliate, we earn on qualifying purchases.