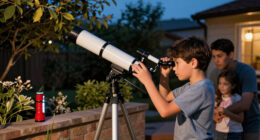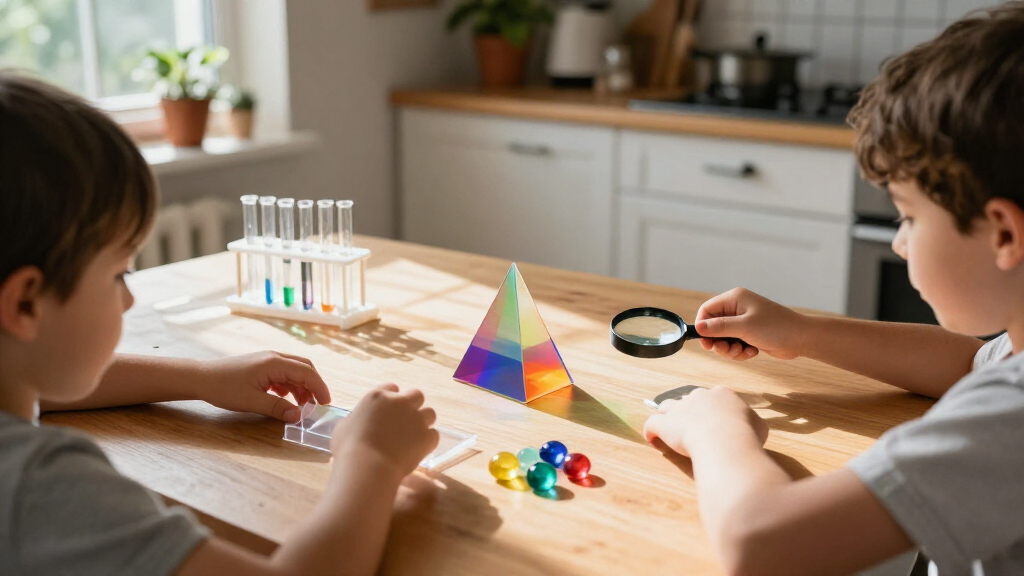

Use this guide to choose a science kit that fits a child’s age and interests, prepare a safe workspace, and complete an activity together. It is for parents, caregivers, and educators with no specialist science background. Plan for 15-30 minutes to compare kits and 30-60 minutes for setup, an experiment, and cleanup. The child should handle only the tasks allowed by the kit instructions and adult supervision.

Prime made for students and young adults
- Fast, free delivery for dorm and study essentials
- Prime Video and Amazon Music included
- Member-only deals
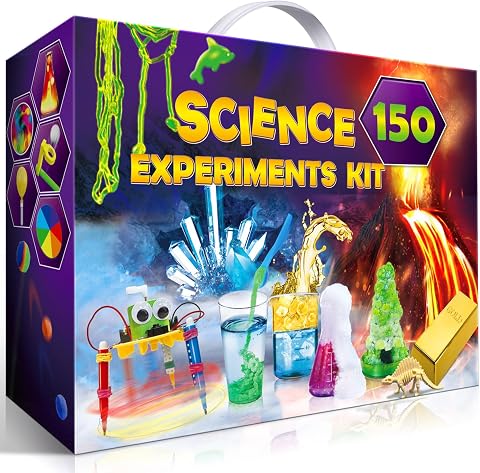
UNGLINGA 150-Experiment Science Kit for Kids
- ✔ Brand: UNGLINGA
- ✔ Experiment count: 150
- ✔ Age guidance: 8 years and up

Doctor Jupiter Preschool Science Kit for Kids Ages 3–5
- ✔ Brand: Doctor Jupiter
- ✔ Age guidance: 3 years and up; described for ages 3–5
- ✔ Activity count: 100+ experiments

National Geographic Science Magic Kit for Kids Ages 8+
- ✔ Brand: Blue Marble
- ✔ Age guidance: 8 years and up
- ✔ Supplied experiments: 20 magic experiments
Difficulty: Beginner | Time: 30-60 minutes for the first activity; kit selection may take 15-30 minutes
What You’ll Need
Tools & Materials:
- A science kit with its complete instruction booklet and listed components
- A flat, well-lit work surface
- Any household materials specified in the instructions, such as water, paper towels, or a clear cup
- Safety items named by the manufacturer, such as goggles or gloves
- A timer, pencil, and paper for recording observations
Knowledge:
- Know the child’s age, reading ability, interests, and any relevant allergies or sensitivities
- Be ready to read and follow the kit’s safety and disposal instructions
- Understand that an adult must supervise activities involving heat, sharp tools, small parts, powders, or liquids
Set aside uninterrupted time and read the activity before inviting the child to begin. Check the package for an age range, warnings, and required materials. Do not use a kit with missing safety information or damaged, leaking, or unlabeled contents.
UNGLINGA 150-Experiment Science Kit for Kids
For school-age children who want to explore more than one branch of science, UNGLINGA’s 150 experiments give this kit the broadest stated scope in our lineup. Activities touch on chemistry, physics, Earth science, and surface tension, so it can suit a child whose interests shift from one project to the next. The illustrated, step-by-step manual and included goggles and child-friendly tools support a more structured activity session than a household-only activity booklet.Its range is the reason it ranks ahead of the National Geographic kit for general-purpose exploration: that option centers on magic tricks, while UNGLINGA spans multiple topics. But the activity count needs context. Not every experiment has all its materials in the box, and some rely on common household items, so families should expect to check the instructions and gather supplies. Compared with Doctor Jupiter, it is also intended for older children rather than preschoolers. This is our strongest all-round choice when variety matters, provided an adult is comfortable helping prepare projects and the child is ready for guided experiments.
Pros:
- 150 experiments cover chemistry, physics, Earth science, and surface tension.
- Illustrated step-by-step instructions help children follow activities.
- Includes goggles and child-friendly experiment tools.
- Some projects use common household items, extending the activity options.
Cons:
- Materials for every experiment are not included.
- The breadth may require adult help to prepare supplies and guide activities.
Best for: Families with children ages 8 and up who want a guided kit spanning several science topics and are comfortable supplementing some activities with household supplies.
Not ideal for: Preschoolers, children who want a fully supplied experiment for every activity, or families seeking a kit built around one distinctive presentation style.
Bottom line: Choose UNGLINGA for the widest stated mix of school-age science topics, as long as you are prepared to supply some materials yourself.
“Choose UNGLINGA for the widest stated mix of school-age science topics, as long as you are prepared to supply some materials yourself.”
Doctor Jupiter Preschool Science Kit for Kids Ages 3–5
Among these three options, Doctor Jupiter is the only kit designed specifically for preschoolers. Its 100-plus activities introduce colors, bubbles, water, motion, sound, and simple reactions through hands-on exploration. The supplied cups, funnel, spray bottle, bubble wand, color-mixing tray, and other tools give young children ways to observe and participate, while illustrated instructions and online activity access offer adults a starting point for screen-free sessions.That age focus matters more than matching the older kits’ experiment counts. UNGLINGA offers wider subject coverage, and National Geographic builds its activities around magic tricks; neither is described as a preschool kit. Doctor Jupiter is therefore the better fit for early exploration, not a substitute for the more varied school-age projects. Adult participation is part of the practical picture: children ages 3–5 may need help following instructions and using the tools. Older children looking for deeper or more advanced experiments are likely to outgrow its simple, sensory activities.
Pros:
- Designed around the developmental range of ages 3–5.
- 100-plus activities cover sensory themes such as bubbles, water, colors, and motion.
- Includes a varied set of tools, including cups, a funnel, and a bubble wand.
- Illustrated instructions and online activity access support guided exploration.
Cons:
- Activities may be too simple for older children seeking advanced projects.
- Preschoolers may need an adult to help with the experiments.
Best for: Parents or caregivers looking for a first science activity kit for a child ages 3–5, with guided sensory exploration and adult participation.
Not ideal for: Older children who want more advanced experiments, or adults looking for a kit children can use independently without guidance.
Bottom line: Doctor Jupiter is the age-appropriate starting point for preschool science, especially when an adult can explore alongside the child.
“Doctor Jupiter is the age-appropriate starting point for preschool science, especially when an adult can explore alongside the child.”
National Geographic Science Magic Kit for Kids Ages 8+
The National Geographic Science Magic Kit gives science a theatrical hook: 20 supplied experiments are presented as magic tricks, with a wand, white gloves, and an illustrated guide that explains the science behind each activity. That format can appeal to children who enjoy showing a result to family or friends, and the explanations connect the performance to the underlying ideas. It stands apart from UNGLINGA, which offers more topic variety but no stated magic framing.Look closely at the split between what is supplied and what is an extension. The kit includes materials for its 20 magic experiments, while the bonus booklet’s 85-plus additional activities use common household items. This makes it a more focused pick than UNGLINGA’s 150-experiment set, and less age-flexible than Doctor Jupiter’s preschool activities. Choose it when the trick format is likely to keep an eight-year-old engaged; skip it if your priority is the largest selection of experiments with materials already provided.
Pros:
- Magic-trick presentation gives experiments a clear performance angle.
- Illustrated guide explains the science behind the activities.
- Includes materials for 20 magic experiments, plus a wand and white gloves.
- Bonus booklet adds more than 85 household-item activities.
Cons:
- Only 20 experiments have materials included in the main kit.
- Bonus activities depend on families finding common household supplies.
Best for: Children ages 8 and up who enjoy performance, demonstrations, and learning the explanation behind a science trick.
Not ideal for: Families wanting a broad, fully supplied experiment collection or a kit tailored to preschool learners.
Bottom line: Pick this kit when the magic presentation is the draw and your child will enjoy explaining how the tricks work.
“Pick this kit when the magic presentation is the draw and your child will enjoy explaining how the tricks work.”
As an Amazon Associate we earn from qualifying purchases.
Before You Start
Choose an activity with a clear start and finish that matches the child’s attention span. Keep food and drinks away from the work area. Tie back long hair, clear clutter, and keep pets away while materials are in use. Adults should do any task the instructions reserve for them; never substitute household chemicals or combine kit materials unless the booklet directs you to.
Step-by-Step Instructions
Step 1: Match the kit to the child
Compare the package age range with the child’s age and ability to follow directions. Pick a topic the child already enjoys, such as plants, magnets, weather, rocks, or simple machines. Read the activity list and choose a kit that offers a manageable first experiment, clearly labeled parts, and instructions you can understand. Check whether it requires extra supplies or repeated observations over several days.
Tip:For younger children, favor activities with fewer small parts and short, visible results. An adult should handle any component the label identifies as unsuitable for the child.
Check: You can name the first activity, list everything it needs, and explain why its age range and supervision level fit the child.
Step 2: Check the contents and instructions
Open the kit on a clear surface and compare its contents with the parts list. Read the complete instructions, including safety warnings, cleanup, and disposal guidance, before opening sealed materials or starting the experiment. Find any household supplies listed and inspect containers for damage, leaks, or missing labels.
Tip:Keep the booklet nearby throughout the activity. If a part is missing or a container is damaged, stop and contact the seller or manufacturer before proceeding.
Check: All required kit parts and household supplies are present, and you know which steps require adult help.
Step 3: Prepare the work area
Cover the table if the instructions suggest it, and place only the materials needed for the selected experiment within reach. Put on the protective equipment specified by the manufacturer. Move food, drinks, and unrelated objects away, and keep a sink or cleanup supplies accessible if the activity uses liquids.
Tip:Do not add goggles or gloves as a substitute for following the kit’s specific safety directions. Use the listed protective gear and follow any ventilation guidance.
Check: The surface is stable and uncluttered, required protective gear is ready, and the child can reach only the materials they are allowed to handle.
Step 4: Set a question and make a prediction
Read the experiment’s goal with the child and ask one simple question about what might happen. Invite the child to say or draw a prediction before starting. Write it down with the date, or use the kit’s worksheet, so you can compare it with the result.
Tip:Treat predictions as guesses to investigate. Avoid telling the child that an unexpected result means they did something wrong.
Check: The child can state what the activity will test and has recorded a prediction in words or a drawing.
Step 5: Carry out the experiment in order
Follow one instruction at a time and let the child do the age-appropriate actions. Measure, count, or observe exactly as directed; use only the quantities and materials specified. Pause at checkpoints in the booklet and have the child describe what changed. Adults should handle restricted steps, and everyone should keep materials away from mouths and eyes.
Tip:Do not skip ahead or repeat a step unless the instructions say to. If the result seems different from the expected one, record what happened before making any changes.
Check: You have followed the listed sequence, and the child can point to or describe at least one observation from the activity.
Step 6: Record and discuss the result
Write down or draw the final result, including measurements or elapsed time when the kit requests them. Compare the observation with the original prediction. Ask the child what evidence they noticed and what they would change or test next, without supplying an answer before they have a chance to explain.
Tip:A useful result can differ from the booklet’s illustration. Focus on what the child observed and whether the steps were followed.
Check: The child has a recorded observation and can describe one way it matched or differed from the prediction.
Step 7: Clean up and store the kit
Use the booklet’s directions to dispose of materials, wash reusable parts, and clean the work surface. Have the child wash their hands after handling kit components. Dry reusable pieces as directed, return them to their labeled storage, and keep the instructions with the kit for the next activity.
Tip:Do not pour materials down a drain or put them in household trash unless the instructions permit it. Ask an adult to manage disposal when the label gives special directions.
Check: The workspace is clean, materials are disposed of as directed, and the kit is dry, complete, and stored safely.
Common Mistakes to Avoid
- Choosing a kit based only on its theme or package picture. — Check the age range, supervision needs, full activity list, and extra supply requirements before buying or opening it.
- Starting before reading safety, setup, and disposal instructions. — Read the entire activity first and gather the listed supplies so you do not have to leave the child with materials mid-experiment.
- Changing amounts, steps, or materials to make an experiment go faster. — Follow the booklet as written. Record unexpected results and repeat only when the instructions allow it.
- Treating a result that differs from the picture as a failure. — Help the child record what actually happened, then check the steps and discuss possible reasons for the difference.
Troubleshooting
Problem: A required part or household supply is missing.
Solution: Pause before starting. Check the parts list and package again. Obtain the specified household supply or contact the seller or manufacturer about a missing kit component.
Problem: The experiment shows no visible change.
Solution: Check the instructions for a waiting period, measurement, or observation that is easy to miss. Confirm that you used the specified quantities and sequence. Record the result; do not add unlisted materials.
Problem: The child loses interest or finds the directions difficult.
Solution: Pause at a safe stopping point, summarize the next action in one sentence, and offer the child a choice between a permitted task, such as measuring or drawing. If needed, finish later according to the kit’s storage instructions.
Problem: A spill, skin contact, or irritation occurs.
Solution: Stop the activity and follow the product label’s first-aid and cleanup directions. Keep the container and booklet available. Contact local emergency or poison advice services if the label directs you to or symptoms are serious.
What Success Looks Like
The activity is complete when the child has followed the kit’s steps with appropriate adult supervision, recorded at least one observation, and compared it with a prediction. The workspace is clean, materials have been disposed of as directed, and reusable parts are stored safely. The child should be able to explain in simple words what they saw or measured, even if the result differed from the example.
Next Steps
Choose a second activity from the same kit that builds on the child’s interest or asks a new question. Keep the observation sheet with the kit and note which parts or supplies need replacing. For experiments that run over several days, set a time to check them and follow the booklet’s storage instructions between observations. Stop using the kit if its instructions are lost and safety or disposal details cannot be confirmed.
Frequently Asked Questions
How do I know if a science kit is right for my child’s age?
Start with the manufacturer’s age range, then check the reading level, small parts, supervision notes, and activity length. Choose a kit whose steps an adult can guide comfortably and whose child-facing tasks match the child’s abilities.
Should I help my child get the expected result?
Help with setup and safety, then follow the steps without altering them to force a particular outcome. Record what happened and talk through possible reasons. Observing an unexpected result still gives the child evidence to discuss.
Can I replace a missing kit material with something similar?
Only use a replacement if the manufacturer or activity instructions specifically approve it. Similar-looking materials can behave differently. Contact the seller or manufacturer when a supplied component is missing.
What should I do if the experiment does not work?
Check whether it needs more time, review measurements and step order, and compare the setup with the booklet. Note the outcome and repeat only if the instructions permit it. Do not add other substances or change amounts to troubleshoot.